![]()
Clover is a great tool for generating code coverage reports from your unit tests. It can be executed as a plugin in Eclipse, Maven or Ant.
However, not everyone knows that it can also be used to collect coverage data of integration tests.
This post explains how to collect coverage data with clover at runtime.
This post assumes that you already know what are unit and integration tests.
This post assumes that you know what Clover is, and already used it either with Eclipse, Ant or Maven.
*Let me assured you that even though the directions bellow seems complicated and clumsy at first, after doing them once or twice it is really easy to repeat them.
Motivation
The default action of Clover is to gather code coverage information during build time or compile time. Therefore, This information includes just the coverage data created by unit tests.
If you are developing web applications, you probably use more technologies to test your applications beside unit tests. These technologies may include HTTPUnit/HTMLUnit or automation technologies (like Selenium). These technologies do not work at build time, they can only work during run time, where a web server is up and running and HTTP calls are made.
As a result, the code coverage made during build time is not reflecting the actual code coverage. We should be able to test the coverage while a server is running.
The idea
The idea is that we will first run clover regularly during build time. We will than take the clover artifacts, put them in our server and then run the integration tests.
While running the integration tests, the clover database will be updated and we would be able to generate reports from it which will reflect both unit and integration tests.
Step 1 – Preparation
- Make sure that you have a web/application server (Tomcat/JBoss/weblogic…) with your web application already deployed.
- Execute clover on your application as you would normally do (either by compiling the code on eclipse or by building with Maven or Ant, it doesn’t matter).
The result of this action would be:- Clover DB files.
One of the outcome of executing the clover on your code are the DB files.
The DB files hold all the information about your code and the coverage itself.The location of those files may change depending on the way you use clover and according to the way you configured clover in your environment.
This is how the files looks like
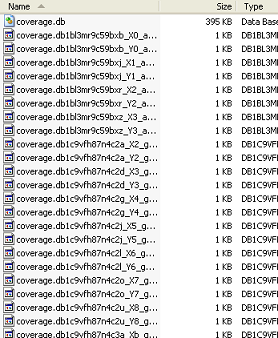
the .db file holds the information regarding your code (classes, methods and so on). All the other files hold all the coverage data.
It is important that you will locate those files because we are going to use them in the next step.
- An instrumented code.
Another outcome of clover is that it instruments your code. A clover call is injected into each method so it would be reported in the coverage calculation.
We will need this code. we will use this instrumented code in runtime to update the coverage data.If you use Eclipse than the generated classes would be instrumented. If you use Maven or Ant than most chances are that a jar with all the instrumented code would be generated separately.
Search the instrument code jar. Again, I can’t tell you exactly where it is located, but usually it generates a jar with a ‘clover’ postfix. Example: if your jar name is my_app.jar, than the generated instrumented code jar will probably be something like my_app-clover.jar.
So you will need to do some detective work here to find the instrumented classes/jar. If you are not sure whether the classes are instrumented or not, just decompile one of them with Jad and search for the word clover inside of it. - A code coverage report.
This is a report with the unit test coverage. We don’t really need this, but it would be good so that we would be able to compare it with the report we will generate at the end.
- Clover DB files.
Step 2 – Updating the server
The next steps are very important, please make sure you do them properly.
- Replacing the existing application jar/classes with the instrumented jar/classes.
Take the instrumented jar/classes that were created by the clover and add it to your server’s classpath instead of the original jar/classes.
The instrumented code will cause the clover DB to be updated with the runtime data. - Adding clover jars and license.
Since we will use clover on runtime we will need also the clover jars in our server’s classpath.
So add the clover own jars to your server’s classpath. If you are using clover with Eclipse than these jars are located in the plugin folder of Eclipse. If you are using Maven than they will be loacted in your repository.* Make sure you are using the same version of clover in your server as you used to generate the DB files and instrumented code, otherwise it will not work and you will get error messages.
Also add the clover license file to the same location as the jars. - Adding the clover java argument.
Add the following java arg -Dclover.initstring.basedir={location of the db files that were created by the clover}.
*Notice – the path you have entered above is the path of the folder which contains the DB files.
Example:
-Dclover.initstring.basedir=C:/workspace/MyWebApp/target/clover.
This java argument is used by the clover to locate the DB files and update them.
Step 3 – Restarting the server and running the tests
Now that hopefully all is set properly all that you need to do now is to restart your server and than running your integration tests.
The tests should trigger the instrumented code which will call the clover API’s and will update the clover DB.
-
While running the tests:
- Look at your log/console and search for error messages from clover.
- Look at the folder which holds the clover DB files. If everything is going as it should, new files will be created in this folder while running the tests.
If not everything is going well the first time, don’t discourage, just go over each of the steps again.
Step 4 – Generating an updated report
If everything went well and new files were created in the DB folder than that means you just need to generate a new report.
If you are using clover with eclipse than you can simply push the reload button  to reload the coverage data.
If you are using Maven or Ant you can execute just the task which generates the report.
Another way is to use the clover HtmlReporter to generate a report easily.
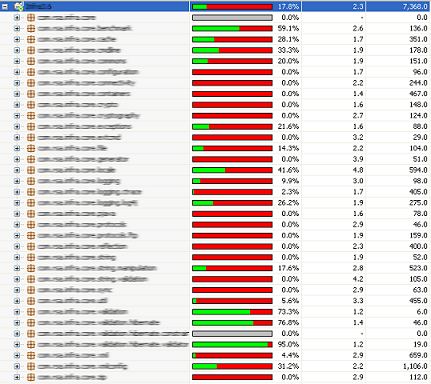
Now compare the new report to the old report. You should see that the new report coverage is much bigger than the old one since it contains also the integration tests coverage.
*Notice that not all the data is updated, even though the percentages are being updated, for some reason the calls counter does not.
To summarize. As mentioned; yes, these instructions seems a bit complicated but after you succeed the first time, it is very easy to repeat it. In the company I work for we even made this whole process automatic and we are able to generate a full coverage report with unit and integrated tests combined.
Very well explained..thanks..I configured clover with JBoss to measure integration test cases coverage.
Hi
This is w.r.t integration testing with selenium..
While compiling the code with clover it generated a .class files along with associated clover files.The .ear file gets generated,which is placed in the servers deployment folder.As per the above mail it generates some clover related jar file which I could hardly find.So am deploying on the clover integrated .ear file.Could you please let me know if any other configuration is required.
Hi,
I followed all the steps and can see the new db files being created in clover db folder. However, I don’t see any change in my report.
I have decompiled a class file and its instrumented. Can someone help me plz
Awesome, works perfectly! Will try it with WebServices as well
Hi,
I we have a web application, I got the WAR file and db location as well,
Will any one suggest me how to deploy it to the server and have a code coverage report on the server.
Thanks,
Ahmed